So in a recent project I had to implement a 16x2 LCD on a PIC16F1827, but the system will work on most PIC microcontrollers, with slight changes to the code. For this project I am using MPLAB X v3.40, a free development environment, and a PICKIT 3, which can be bought at a number of stores online.
Setting up the MPLAB project
- Start off by loading up MPLAB X, if you don't have it already, install it from the Microchip website microchip.com/mplab/mplab-x-ide.
- Start a new project, by going to File->New Project... or by pressing Ctrl+Shift+N.
- The project we want is a standalone project, it should be chosen by default. Next choose the device we want, write in the box PIC16F1827 there should only be one. We want to use the PicKit 3 for the programmer. I am using XC8 as the compiler, this is available from the Microchip website. Finally choose the name of the project, and where you want to keep it. Then click finish.
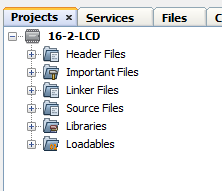
- It wont look like mush at the moment, but under Projects on the right, there should now be your newly created project, with a drop down, and a set of folders. Something like this:
- To start the project, we need a main.c. So right click on Source Files, go to New->C Main File... then in the Dialog, change the name to main. After pressing okay, it should look like this:
Connecting the LCD
LCDs have what is known as a
parallel connection. This means that we send data 8 bits at a time, rather than
serial where it is one at a time. The datasheet for the PIC is found on the microchip website
here. The pinout is found on page 4.
Register Select (RS) pin, this decides which of the two registers that is getting written to. Either the instruction register (what the screen does) or the data register (what is shown on the screen). This is connected to A4 on the PIC.
Read/Write (RW) pin, this decides whether you are writing to or reading from the LCD. This is connected to pin A3.
Enable (E) pin, is to tell the LCD when data needs to be transferred. Pulsing this pin will write or read to the registers the data on the data pins. This is connected to pin A2.
These pins are defined at the top of the code, to make life easier for us later on.
#define LCD_RS LATAbits.LATA4   //LCD Command/Data Control
#define LCD_RW LATAbits.LATA3   //LCD Read/Write Select
#define LCD_E LATAbits.LATA2    //LCD Enable Line
Data Pins (D0-D7), are the pins that transfer the information between the LCD and the PIC. These are connected to pins B0-B7. So B0 is connected to D0, and so on until B7 is connected to D7.
Vdd and Vss are connected to 5v and GND respectively.
Contrast (Vo) is connected to a 10k pot between the 5v and GND.
If the LCD you are using has connections for a backlight, follow the datasheet for instructions, on mine I connect it t0 5v and GND.
The Code
Below is the function I create to send data to the LCD.
#define LCD_CMD 0
#define LCD_TXT 1

void LCD_DATA (unsigned char data, int type)
{
    __delay_ms(100);   // short delay

    LATB = 0x00;       // reset the register to 0
    LATB = data;       // set B output to the data we want to send
    __delay_ms(1);     // short delay for data to set

    if (type == LCD_CMD)
    {
        LCD_RS = 0;    // command mode
    }
    else
    {
        LCD_RS = 1;    // character/data mode
    }

    LCD_RW = 0;        // start the pulse
    __delay_ms(1);     // small delay
    LCD_E = 1;         // enable LCD data line
    __delay_ms(1);     // small delay
    LCD_E = 0;         // disable LCD data line
    __delay_ms(5);
}
Calling this function in the main, like follows will send data to the LCD. Notice the #define at the top, these are declaring LCD_CMD and LCD_TXT. Basically, when the type is LCD_CMD the LCD is sent into command mode, by setting the RS pin. Equally, sending LCD_TXT will clear the RS pin, putting the LCD in character mode.
The information on the data pins will then get written to the LCD, by clearing RW. To actually tell the LCD that it needs to be sent new instructions the enable pin needs to be pulsed. Once this happens, the screen should be updated with the new information.
#include <stdio.h>
#include <stdlib.h>
#include <xc.h>

#define _XTAL_FREQ 500000

#define LCD_RS LATAbits.LATA4   //LCD Command/Data Control
#define LCD_RW LATAbits.LATA3   //LCD Read/Write Select
#define LCD_E LATAbits.LATA2    //LCD Enable Line

#define LCD_CMD 0
#define LCD_TXT 1

void LCD_DATA (unsigned char data, int type)
{
    __delay_ms(100);   // short delay

    LATB = 0x00;       // reset the register to 0
    LATB = data;       // set B output to the data we want to send
    __delay_ms(1);     // short delay for data to set

    if (type == LCD_CMD)
    {
        LCD_RS = 0;    // command mode
    }
    else
    {
        LCD_RS = 1;    // character/data mode
    }

    LCD_RW = 0;        // start the pulse
    __delay_ms(1);     // small delay
    LCD_E = 1;         // enable LCD data line
    __delay_ms(1);     // small delay
    LCD_E = 0;         // disable LCD data line
    __delay_ms(5);
}


int main(int argc, char** argv) {

    // write "hello world!" on the first line
    LCD_DATA('h', LCD_TXT);
    LCD_DATA('e', LCD_TXT);
    LCD_DATA('l', LCD_TXT);
    LCD_DATA('l', LCD_TXT);
    LCD_DATA('o', LCD_TXT);
    LCD_DATA(' ', LCD_TXT);
    LCD_DATA('w', LCD_TXT);
    LCD_DATA('o', LCD_TXT);
    LCD_DATA('r', LCD_TXT);
    LCD_DATA('l', LCD_TXT);
    LCD_DATA('d', LCD_TXT);
    LCD_DATA('!', LCD_TXT);

    while (1)
    {

    }

 return (EXIT_SUCCESS);
}